

How to Measure Wheel Clearance Around Brake Calipers
Last Updated: November 14, 2026
Quick Summary
To measure wheel clearance around brake calipers, remove the wheel and measure two dimensions at the tightest point: radial clearance (caliper height from hub center to the barrel) and axial clearance (caliper depth from the hub face to the spokes). Record every number in millimeters and compare them to the wheel's barrel profile and backspacing.
- Wheel diameter describes the barrel, not the space inside it, so a 19-inch wheel and brake package can still fail.
- Measure caliper depth at the top, middle, and bottom because calipers are not uniform.
- Print clearance templates at 100% scale and verify the scale bar with a ruler before trusting them.
- For street use, keep at least 3 mm of radial and 3 mm of axial clearance; double it for track use.
- If a wheel does not clear, a hub-centric spacer or lower-offset wheel are safe options.
Table of Contents
- Why Wheel Diameter Alone Does Not Guarantee Brake Clearance
- Tools and Materials Needed for Measuring Brake Caliper Clearance
- Step-by-Step: Removing the Wheel and Preparing the Vehicle
- Measuring Radial and Lateral Brake Clearance
- How Wheel Offset and Caliper Clearance Interact
- Using a Brake Caliper Clearance Template Correctly
- Common Measurement Errors and What to Do When a Wheel Does Not Clear
- Book a Mobile Tire Changeover With Guaranteed Fitment
- Frequently Asked Questions
Why Wheel Diameter Alone Does Not Guarantee Brake Clearance
A 19-inch wheel and a 19-inch brake package can still fail on wheel clearance, and that surprises a lot of drivers. The reason is simple: wheel diameter describes the barrel, not the shape of the space inside it.
Understanding how to measure wheel clearance around brake calipers comes down to two dimensions, not one. Radial clearance is the gap between the outermost point of the caliper and the inside of the wheel barrel. Axial clearance is the gap between the caliper face and the spokes, measured from the hub face outward.
Big brake kits and disc brake conversions make this worse. A larger rotor pushes the caliper farther from the hub center. A thicker caliper moves it closer to the spokes. Neither change shows up in a wheel diameter spec sheet.
Below, we walk through the full measurement workflow, the tools you need, and the tolerances that matter for street versus track use.
Tools and Materials Needed for Measuring Brake Caliper Clearance
You need five things before you start, and none of them are expensive. A digital caliper with a depth rod handles most measurements. A rigid straight edge, ideally 300 mm or longer, spans across surfaces for reference lines. A tape measure covers larger spans. A notepad and marker record every number. A flashlight or work light helps you see inside the barrel.
Optional but useful: a wheel manufacturer's brake clearance template, if one is available for your wheel. These templates show the spoke profile and barrel shape as a cutout you can hold against the caliper.
Here is what to avoid:
- Flexible tape only. It bends and reads short.
- Measuring by eye. A 3 mm error is the difference between safe and rubbing.
- Skipping the wheel-off measurement. You cannot measure caliper depth accurately with the wheel mounted.
Record every number in millimeters. Mixing inches and millimeters is one of the most common sources of fitment error.
Step-by-Step: Removing the Wheel and Preparing the Vehicle
The measurement only works on a clean, level surface with the wheel off. Here is the sequence we recommend.
- Park on level ground and chock the wheels still on the vehicle.
- Loosen the lug nuts half a turn before lifting.
- Lift the corner with a jack and support it on a jack stand. Never work under a jack alone.
- Remove the lug nuts and pull the wheel straight off.
- Clean the hub face with a wire brush. Rust and debris skew every measurement.
- Inspect the caliper and rotor for damage or play.
For a full walkthrough of the removal and reinstall process, follow our aftermarket wheel installation guide alongside these measurement steps.
Watch out: measuring with the car still on a jack and no stand is how people get hurt. A jack stand takes thirty seconds to place and it is not optional.
Measuring Radial and Lateral Brake Clearance
Two numbers decide whether a wheel fits over a caliper: radial clearance and axial clearance. Measure both, and measure them at the tightest point.
Radial clearance is the distance from the highest point of the caliper to the inside of the wheel barrel. Axial clearance is the distance from the caliper's outer face to the back of the spokes, measured along the hub axis.
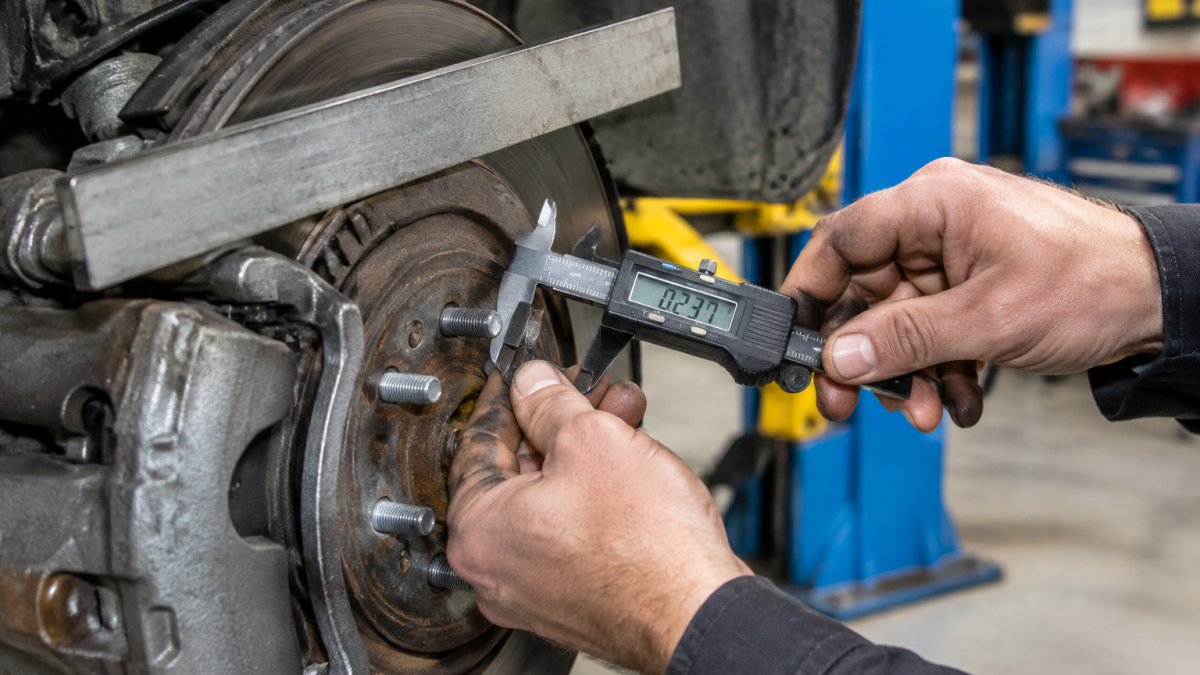
Measuring Caliper Height for Radial Clearance
Caliper height is the radial distance from the hub center to the outermost point of the caliper body. To measure it:
- Place a straight edge across the hub center, horizontally.
- Measure from the hub center straight up to the highest point of the caliper.
- Measure from the hub center straight out to the widest point of the caliper.
- Record both numbers in millimeters.
The larger of the two is your caliper height. Your wheel's inner barrel radius must exceed this number with margin to spare. A wheel with a stepped barrel, where the inner diameter narrows near the spokes, can clear at the widest point and rub at the step. Check the narrowest section, not the average.
Measuring Caliper Depth for Axial Clearance from the Hub Face
Caliper depth is how far the caliper projects outward from the hub face toward the spokes. Use the depth rod on your caliper, or lay a straight edge across the hub face and measure from that plane to the outermost caliper surface.
Do this at three points around the caliper: top, middle, and bottom. Calipers are not uniform, and a tapered spoke can contact at one point only.
Subtract the caliper depth from your wheel's backspacing to estimate axial clearance. If the result is under 5 mm, treat it as a fitment risk rather than a fitment.
How Wheel Offset and Caliper Clearance Interact
Wheel offset is the distance from the hub mounting surface to the wheel's centerline. It moves the entire wheel inboard or outboard, and it changes axial clearance directly.
Lower offset pushes the wheel outboard, away from the caliper face. Higher offset pulls the wheel inboard, closer to the caliper.
Backspacing is the easier number for this job. Backspacing measures from the mounting surface to the inner edge of the wheel.
Offset and caliper clearance are linked, but offset alone does not tell you whether the spokes clear. Spoke shape matters just as much as the number stamped on the wheel.
Using a Brake Caliper Clearance Template Correctly
A brake caliper clearance template is a printed or cut profile of the wheel's inner barrel and spoke shape. You hold it against the caliper and check for gaps.
Most templates come as a PDF from the wheel maker, printed at 100% scale. Print at full size with page scaling turned off, then verify the scale bar with a ruler before you trust it.
To use it:
- Hold the template against the hub face, aligned with the bolt pattern and center bore.
- Rotate it around the caliper to check every spoke position, not just the closest one.
- Compare two profiles separately: the barrel cutout against the caliper's outer radius, and the spoke cutout against the caliper's outer face.
- Mark any contact point with a marker.
- Measure the gap at the tightest point with a caliper.
Watch out: a template aligned to the wrong bolt hole or rotated 180 degrees will show clearance where none exists.
Templates are a starting point, not a substitute for measurement. They assume a stock caliper and rotor.
Common Measurement Errors and What to Do When a Wheel Does Not Clear
A complete vehicle-side sequence looks like this:
- Park on level ground, chock the wheels, loosen the lug nuts half a turn, lift with a jack, and support on a jack stand.
- Remove the wheel and clean the hub face with a wire brush so rust and debris do not skew measurements.
- Measure caliper height (radial) and caliper depth (axial) at the tightest point, recording every number in millimeters.
- Compare those numbers to the wheel's barrel profile, backspacing, and spoke shape, using a verified template where available.
- Test fit the wheel, spin it by hand, listen for contact, then drive slowly and recheck.
Common errors to avoid:
- Measuring the wheel diameter and assuming the barrel is round inside. It rarely is, and stepped barrels narrow near the spokes.
- Forgetting wheel weights and balance tape, which add a few millimeters.
- Ignoring thermal expansion and wheel flex under cornering load.
- Measuring with the wheel mounted and guessing at spoke clearance.
- Recording numbers in inches and millimeters in the same list. Convert once and stay in millimeters.
- Measuring from the wrong hub-face reference or placing the straight edge across a curved surface.
Tolerance guidance differs by use. For street use, most practitioners keep at least 3 mm of radial clearance and 3 mm of axial clearance.
If the wheel does not clear, you have four safe options:
- Add a hub-centric spacer to move the wheel outboard, keeping thread engagement in mind.
- Switch to a lower-offset wheel with the same bolt pattern.
- Choose a wheel with a spoke profile designed for big brake kits.
- Downsize the brake package, which is rarely the right call.
Watch out: forcing fitment with a spacer that leaves too few threads engaged, or grinding a caliper, creates a safety problem rather than a fitment solution.
Test fit before you commit. Mount the wheel, spin it by hand, and listen for contact. Then drive slowly and recheck.
Here are the clearance tolerances and the safe fixes to consider when a wheel does not clear the calipers.
| Item | Value | Note |
|---|---|---|
| Street radial clearance | At least 3 mm | Most practitioners keep this minimum |
| Street axial clearance | At least 3 mm | Most practitioners keep this minimum |
| Track clearance | Double the street figure | Heat growth and cornering flex |
| Fix: hub-centric spacer | Moves wheel outboard | Keep thread engagement in mind |
| Fix: lower-offset wheel | Same bolt pattern | Pushes tire toward the fender |
| Fix: big-brake spoke profile | Wheel designed for big brake kits | Spoke shape matters as much as offset |
| Fix: downsize brake package | Rarely the right call | Last resort option |
Book a Mobile Tire Changeover With Guaranteed Fitment
Getting the measurement right is half the job. Getting the wheel mounted, balanced, and torqued correctly is the other half, and it is the half most drivers would rather hand off.
Book a mobile tire changeover with Rubber Lab Industries and our team comes to your home or workplace. Every wheel, tire, and part we sell carries guaranteed fitment, verified against your vehicle's bolt pattern, offset, and center bore before it ships. Ontario-wide shipping is free.
Get started with Rubber Lab Industries and put the measurement guesswork behind you.
Frequently Asked Questions
How do you measure wheel clearance around brake calipers?
Remove the wheel, then use a straight edge and caliper to measure two dimensions: radial clearance (the gap from the outermost caliper point to the wheel barrel's inner curve) and axial clearance (the gap from the caliper face to the hub mounting surface). Record both in millimeters and compare them against your wheel's spoke profile and barrel dimensions. Always leave a safety margin for thermal expansion and wheel flex, especially for track use.
How much clearance should there be between a wheel and a brake caliper?
For street driving, aim for at least 3 mm of clearance at the tightest point between the caliper and the wheel barrel or spokes. For track use, increase that to 5 mm or more because brake heat causes thermal expansion and hard cornering flexes the wheel. Measure at the closest point, not an average, and check both radial and lateral gaps before committing to a wheel purchase.
Can wheel offset affect brake caliper clearance?
Yes. Wheel offset and caliper clearance are directly linked because offset determines how far the wheel sits inboard or outboard relative to the hub. A lower offset pushes the wheel outward, which can improve spoke-to-caliper clearance but may cause fender rub. A higher offset pulls the wheel inward and can bring the barrel or spokes into contact with the caliper. Always verify offset against your measured caliper depth before ordering.
Should you test-fit a wheel before driving?
Always test-fit before driving. Mount the wheel hand-tight, spin it through a full rotation, and listen and look for contact at the caliper, spokes, and barrel. Check clearance with the suspension at ride height and turned lock-to-lock. A test fit takes minutes and catches problems that static measurements can miss, including spoke curvature and balance weight interference.
